Yeap Phay Min (0331073)
Illustration and Visual Narrative
Final Project - Front & Back and Back & Forth
_______________________________________________________
INSTRUCTIONS
______________________________________________________
Final Project - Front & Back and Back & Forth
04/06/18 (Week 11)
It's time for the final project!
This week, Mr Hafiz gave us a brief on our final project for us to have a clearer idea of what we were required to do. Basically, we need to illustrate a given story, and the final outcome will either be a tunnel book or a webcomic. To start off, he showed us some examples by the seniors. Then, we had to select a story, and he gave us a link with a list of stories by Rudyard Kipling for us to choose from. After scanning through the passages of the stories, I decided to go with the story "How The Whale Got Its Throat" as I found that to be the most interesting among the others.
 |
| Storyline (Part 1) |
 |
| Storyline (Part 2) |
Once I knew what story I was going for, I decided to create a mood board, decide on colour palette, print the story out to highlight some parts and doodle on the paper. In my sketchbook, I also wrote down some points from the story, identify the start-climax-end as well as a mind-map. These helped me have a clearer idea of what the story was about. Then, I proceeded with some sketches.
 |
| Mood board |
 |
| Colour Palette |
 |
| Printed paper of selected story |
 |
| Identifying the points of the story |
 |
| Identifying the start, climax and end |
 |
| Mind-map of selected story |
 |
| Initial sketches |
I got to show Mr Hafiz with what I've done so far and my idea on how I want to illustrate this story which was to make a tunnel book through paper cutting. He told me that since I want to do a tunnel book, I would have to look at the elements in the story as silhouettes, as I would be cutting along the silhouettes. And since I knew the main points I want to illustrate, I could proceed by sketching more of the layers for each main points for my tunnel book.
 |
| More Sketches #1 |
 |
| More Sketches #2 |
 |
| Final Sketches |
 |
| Transitions |
 |
| Tunnel book sketches |
12/06/18 (Week 12)
It's an e-learning week, so we got to work from home. I decided to find references for my tunnel book, make mock-ups, start illustrating on Illustrator and start the paper cutting process.
 |
| Tunnel Book References |
 |
| Mock-up #1 |
 |
| Mock-up #2 |
 |
| References for Illustrations |
 |
| Process of Illustrating on Illustrator |
 |
| Overview of Artboards |
I decided to illustrate the story on Illustrator first, then print it out to trace and draw onto the actual pages of the book. The illustrations are a guide for what I'll be cutting and I might make some small changes along the way.
 |
| Using tracing paper to trace the outlines |
 |
| Transferring the outlines onto the paper |
 |
| The paper cutting process |
 |
| More paper cutting process |
 |
| Outcome of the first four pages |
 |
| Attempting to arrange the pages #1 |
 |
| Attempting to arrange the pages #2 |
18/06/18 (Week 13)
After cutting the first few pages, I realised that the way I illustrated the silhouettes, resulted in the paper after cutting it to be flimsy. For example, the fish was like dangling which made it fragile. Therefore I decided to edit the illustration and recut the pages, so that it'll be more firm once I cut it.
 |
| Final Artboards |
Embedded PDF of the final artboards
 |
| Cutting the pages #1 |
 |
| Cutting the pages #2 |
 |
| Human character with suspenders |
 |
| Arranging the pages |
 |
| Sticking the pages together |
 |
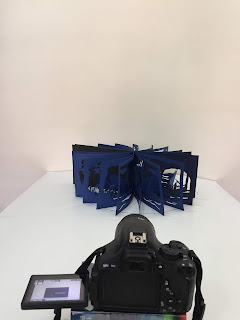
| Outcome after combining the pages |


Comments
Post a Comment