PACKAGING AND MERCHANDISING DESIGN - PROJECT 1

15/04/19 - 06/05/19 (Week 3 - Week 6)
Yeap Phay Min (0331073)
Packaging and Merchandising Design
Project 1 - Paper Bag, Book Sleeve Design
LECTURE NOTES
15/04/19 (Week 3)
Lecture #3: Types of Packaging & Materials
This week, a group presented the topic of types of packagings and materials. Through the lecture, I got to learn about primary, secondary and tertiary packaging in the beginning slides. Then comes the various types of packaging such as corrugated box, boxboard / paperboard cartons, paper bags and sacks. As for the types of materials, it included paper & board, glass, metals, plastic and foam.
Lecture #4: Types of Boxes
Mr Shamsul then gave us a lecture on boxes type and boxes styles. I learned that the common types of boxes included folding cartons, rigid boxes, set-up boxes, cardboard boxes, corrugated boxes, paperboard boxes and more. There are also common elements in folded cartons, and the most common box styles are tuck top. The two types of tuck top boxes are Reverse Tuck End (RTE) and Straight Tuck End (STE), and there are pros and cons to the both of them. Then there's also the tuck top snap-lock bottom and tuck top auto bottom.
06/05/19 (Week 6)
Lecture #6 : Typography in Packaging Design
For this week, a group prepared a lecture on the use of typography in packaging design. To begin, images of packaging designs were shown to us. Then, they moved on to talk about the importance of typography in packaging design. The importance includes grabbing attention and defining the product. The roles of typography in packaging design were also shared with us, along with the things to consider when selecting the typeface for a packaging. Then, the factors that affects typography and how the typography affects the brand were also discussed about. Overall, the presentation was informative.
13/05/19 (Week 7)
Lecture #7: Image & Imagery in Packaging Design
In this lecture, we got to learn and understand about image and imagery in packaging design. Imagery is the ability to form mental images from things or events. It is used to attract target audience, supports product's message and also to create perception of what the product inside is like. As for image, some points to consider includes the relevance of images to the product and brand, target audience and competitors, quality of the image and also the creativity of using the image.
INSTRUCTIONS

15/04/19 (Week 3)
In Monday's class, we were briefed on our first project which is in collaboration with the other module — Publishing Design . In that class, we are required to design and create a book. For the project for this class, we needed to come up with a paper bag, book sleeve and an item of our choice. The design should relate back to the book.
To start off, I searched up some visual references and did some rough sketches on the ideas.
Initial Visual References:
Initial Sketches:
 |
| Fig 1.1: Paper Bag |
 |
| Fig 1.2: Book Sleeve |
 |
| Fig 1.3: Calendar Cards + Box |
24/04/18 (Week 4)
This week, I decided to start with the measurements of each item before moving on to illustrator to work on the dieline.
Measurements of the paper bag, book sleeve and the calendar cards:
 |
| Fig 2.1: Measurements |
Once I had the measurements, I decided to start with the dieline so I could create some mock-ups.
Here are the initial dielines for each item:
 |
| Fig 2.2: Book Sleeve |
 |
| Fig 2.3: Paper Bag |
 |
| Fig 2.4: Box |
With the mockups, I printed them out on A4 papers and tried to assemble them to see how it would look like.
 |
| Fig 2.5: Book Sleeve |
 |
| Fig 2.6: Book Sleeve |
 |
| Fig 2.7: Paper Bag Option #1 |
 |
| Fig 2.8: Paper Bag Option #2 |
 |
| Fig 2.9: Card Box |
29/04/18 (Week 5)
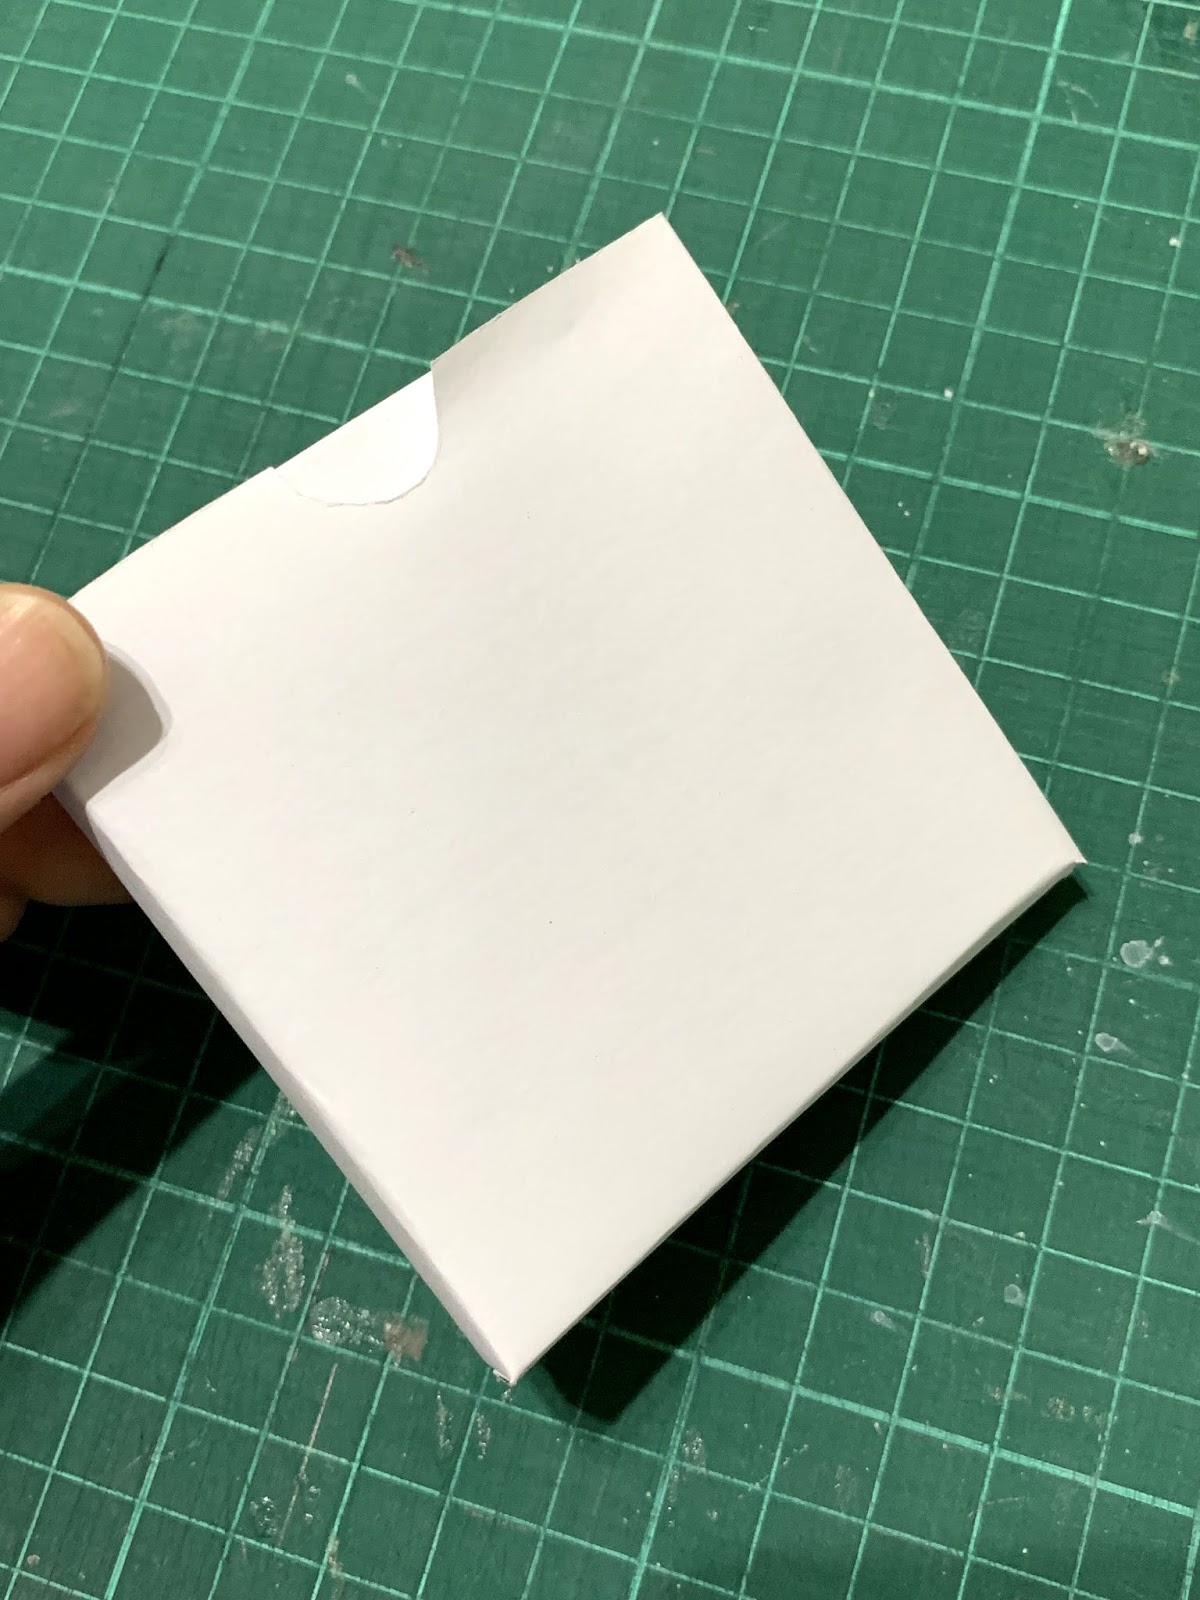
After the first round of dielines and mockups, I got to receive some feedback on them and then make any necessary adjustments to it. Once I updated some of the dielines, I also decided to create more mockups, but this time using art card for it to be more sturdy.
 |
| Fig 3.1: Dieline of book sleeve |
 |
| Fig 3.2: Process of making paper bag mockup |
 |
| Fig 3.3: Process of making card box mockup |
 |
| Fig 3.4: Outcome of paper bag mockup |
 |
| Fig 3.5: Outcome of paper bag mockup |
 |
| Fig 3.6: Outcome of book sleeve mockup (when folded) |
 |
| Fig 3.7: Outcome of book sleeve mockup (when opened up) |
 |
| Fig 3.8: Outcome of card box mockup |
Here's the visuals for my book done in publishing design class:
 |
| Fig 3.9: Visuals for the book |
Rough sketches of the designs:
 |
| Fig 3.10: Rough Sketches |
Calendar card design process:
 |
| Fig 3.11: Process of designing the cards - calendar |
 | |
|
Calendar card box design exploration:
 |
| Fig 3.13: Box design exploration |
06/05/18 (Week 6)
This week I continued to work on the designs for the items.
Book sleeve design exploration:
 |
| Fig 3.14: Book sleeve design exploration |
 |
| Fig 3.15: Book sleeve design exploration |
Initially for the book sleeve I wanted to get it printed on both sides, but I remembered that the printing shop only does double sided printing for up to A3. My book sleeve was on an A2 artboard, so I had to make changes to my design later on.
Paper bag design exploration:
 |
| Fig 3.16: Paper bag design exploration |
 |
| Fig 3.17: Paper bag design exploration |
08/05/18 (Week 6)
On Wednesday's tutorial class, I also got to laser cut an actual size mockup of my paper bag.
 |
| Fig 4.1: Laser cut process |
 |
| Fig 4.2: Laser cut process |
 |
| Fig 4.3: Laser cut process |
 |
| Fig 4.4: Outcome of actual size mockup |
 |
| Fig 4.5: Updated dieline |
I also finalised my designs this week so I could get it printed at the end of the week. I had two designs for the paper bag and card box so I could print both and see which one I liked best. I also just had a feeling that things may not go like I hoped it will so by printing two copies I would have a back-up.
Final Designs
Paper Bag:
 |
| Fig 4.6: Paper Bag Design #1 |
 |
| Fig 4.7: Paper Bag Design #2 |
 |
| Fig 4.8: Book Sleeve Design |
 |
| Fig 4.9: Pocket Design for Book Sleeve |
Calendar Cards & Box:
 |
| Fig 4.10: Calendar Cards - Monthly Dates |
 |
| Fig 4.11: Calendar Cards - Quotes & Illustrations |
 |
| Fig 4.12: Box Design #1 |
 |
| Fig 4.3: Box Design #2 |
11/05/19 (Week 6)
On Saturday, I went and got my designs printed and I could start to cut and assemble them.
 |
| Fig 5.1: Printed designs |
 |
| Fig 5.2: Process of cutting the cards |
 |
| Fig 5.3: Creating rounded edges |
 |
| Fig 5.4: Printed book sleeve |
 |
| Fig 5.5: Printed Paper Bag |
Back home I continued to cut and assemble the card box and the book sleeve. I left the paper bag untouched for now as I wanted to get it laser cut in campus.
 |
| Fig 5.6: Box |
 |
| Fig 5.7: Book Sleeve |
 |
| Fig 5.8: Book Sleeve |
 |
| Fig 5.9: Pocket |
 |
| Fig 5.10: (Random Picture) Part of the mess created |
13/05/19 (Week 7)
On Monday, I got to try and laser cut the paper bag and one of my calendar box as I had printed extra copies of it.
As for the paper bag, the alignment was off and it didn't cut exactly where the design was and it burned the synthetic paper a little at the sides. And for the calendar box, the alignment was pretty accurate, however the setting was too high in which the scoring line cut through the material completely.
 |
| Fig 6.1: Laser cut process - Paper bag |
 |
| Fig 6.2: Laser cut process - Paper bag |
 |
| Fig 6.3: Failed laser cut on box |
Back home I tried to trim and assemble the paper bag so at least I have an idea of what it looks like.
 |
| Fig 6.4: Failed paper bag |
The laser cut studio was fully booked on Wednesday and if we wanted to get it laser cut again it would be on Saturday. Since I had to get my designs reprinted, I also decided to make some changed to the design of my paper bag so it didn't have any curves as I wanted to try and hand cut it instead of laser cut. As for the card box, I made the semi-circle hole smaller so it would be easier to hand cut as well.
I also thought about the material selection again. The art card material made some ugly creases when it was folded. However, the material of sticker laminated on an art card was good, as it did not result in any bad creases and folds pretty nicely. Therefore I decided to reprint the box design on that material, and it would match the material of the book sleeve as well. For the paper bag, since I had to get it printed on A1 paper, the printing shop I went to only prints A1 on synthetic paper so I decided to go with that material again, this time with an attempt to hand cut it.
16/05/19 (Week 7)
I had no class this day so I decided to get my designs reprinted.
Updated files for printing:
 |
| Fig 7.1: Paper Bag |
 |
| Fig 7.2: Calendar Box |
 |
| Fig 7.3: Process of cutting the box |
 |
| Fig 7.4: Folding the paper bag |
 |
| Fig 7.5: Failed paper bag with the bottom & sides being messed up |
The calendar box turned out okay, however the paper bag was kind of a fail to be honest. The folding part was a little messy and I wasn't happy with how it turned out, so I ended up folding the first A1 paper I printed on in the previous week.
Finally, after a lot of struggles with printing, cutting and assembling everything, I completed all three items. Then, I took pictures of the items and compiled all the final images of the 3 items into a set of slides, including the rationale on why I chose the 3rd item.
Final Images:
 |
| Fig 7.6: All 3 items |
 |
| Fig 7.7: All 3 items |
 |
| Fig 7.8: Paper Bag |
 |
| Fig 7.9: Paper Bag |
 |
| Fig 7.10: Paper Bag |
 |
| Fig 7.11: Inside of Paper Bag |
 |
| Fig 7.12: Items Inside Paper Bag |
 |
| Fig 7.13: Book Sleeve - Front |
 |
| Fig 7.14: Book Sleeve - Back |
 |
| Fig 7.15: Book Sleeve- Pocket Inside |
 |
| Fig 7.16: Calendar Cards Box - Front |
 |
| Fig 7.17: Calendar Cards Box - Back |
 |
| Fig 7.18: Calendar Cards + Box |
 |
| Fig 7.19: Calendar Cards - Front |
 |
| Fig 7.20: Calendar Cards - Back |
 |
| Fig 7.21: Quotes + Illustration on Cards |
 |
| Fig 7.22: Both sides of cards |
Here is the compilation of the final images in a set of slides, including labels and rationale for the third item.
Towards the end of the semester, I decided to reprint my book sleeve to not only switch up the design a little but also make it smaller. It is no surprise that I struggled a lot in this project. However I kept telling myself to keep on trying and trying, even after folding a total of 5 book sleeves.
In the end it worked out, I hope. Here are pictures of the updated book sleeve.
 |
| Fig 8.1: Updated & Final Design - Sleeve |
 |
| Fig 8.2: Updated & Final Design - Pocket |
 |
| Fig 8.3: Book Sleeve - Closed |
 |
| Fig 8.4: Book Sleeve - Opened |
FEEDBACK
24/04/18 (Week 4)
Specific feedback: The material for the paper bag and book sleeve should be similar so there is consistency between them. The item I've selected is okay and I can proceed with it. To move on from my visual references and sketches, I should start on the dieline and structure of my designs.
29/04/18 (Week 5)
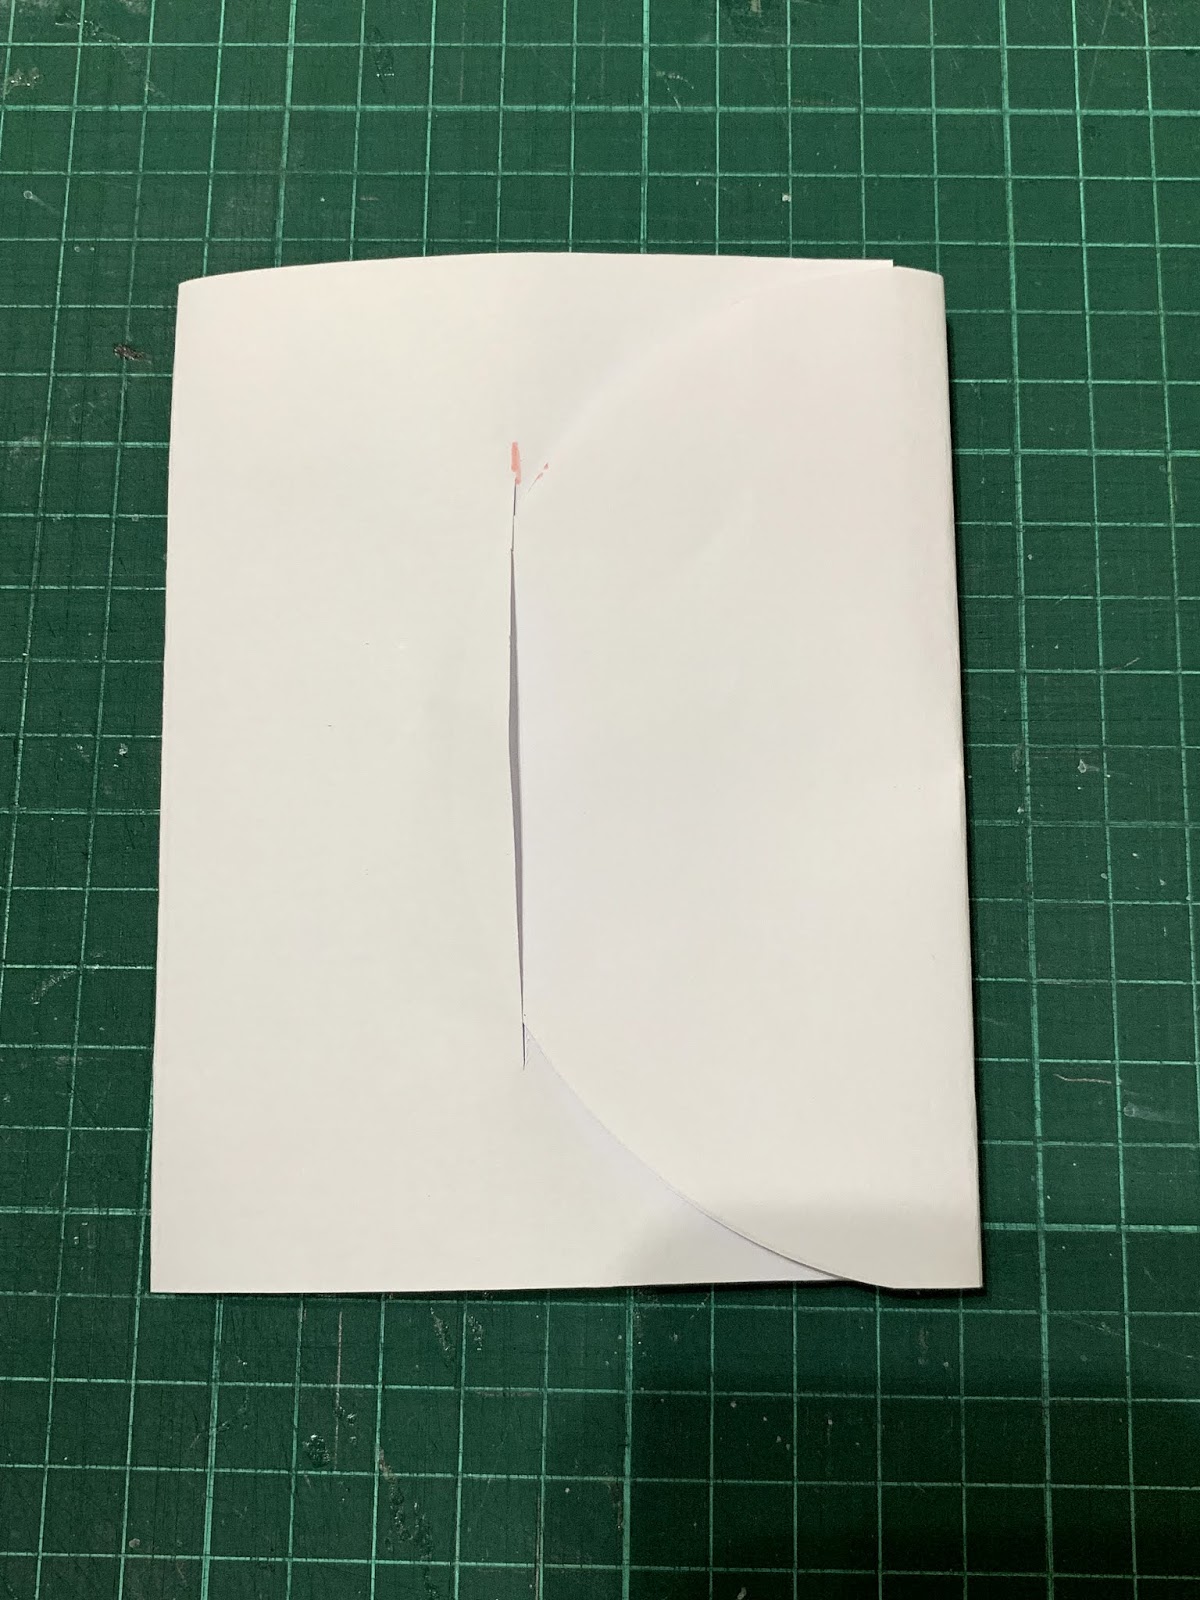
Specific feedback: This week, I got to show some mock-ups that I've done. Mr Shamsul mentioned that for my book sleeve, the slit is too big so I could try a different approach and not have it in a shape of a semi-circle.
06/05/18 (Week 6)
Specific feedback: Ms Maria mentioned that for my book sleeve it could have those little gaps for the lock to be better. For my paper bag, she mentioned that the creases in my mockup could be due to the material and also the size of it.
08/05/18 (Week 6)
Specific feedback: Mr Shamsul said that the mockup for the book sleeve seems okay, and for my paper shouldn't have an extra paper wrapped around it. I could straight away print my design on the paper bag, and laser cut on it later on.
13/05/19 (Week 7)
Specific feedback: For the book sleeve's flap, I could trim it to be smaller so that it would be easy to slide in and out. As for the card box, the curved cut out should be smaller. The material of the sticker laminated on art card and synthetic paper are okay.
REFLECTION
EXPERIENCE
15/04/19 (Week 3)
I got to have the experience of coming up with ideas for the design of the 3 items for our book which seems interesting, and hopefully things will go well. *fingers crossed*
24/04/18 (Week 4)
I got to start doing more sketches, take measurements and create the dielines for my design.
29/04/18 (Week 5)
We had an extension for this project, allowing us more time to work on the dielines and designs before printing them.
08/05/18 (Week 6)
This week, I continued to make changes to my dielines, laser cut my paper bag as an actual sized mockup and also finalise my designs for printing as I wanted to print them out this week.
13/05/19 (Week 7)
I spent this week printing, cutting and assembling the products. Honestly, it was quite a struggle for me as I couldn't get it right initially and had to get the design reprinted again.
OBSERVATION
15/04/19 (Week 3)
I observed that there are so many designs out there, but I need to make sure whatever I design suits the idea of my book, maintaining both aesthetic and functionality of it.
24/04/18 (Week 4)
I observed that creating mockups and rough drafts of my design does help me further visualise how I want it to look like in the end.
29/04/18 (Week 5)
I observed that I was a little lost with how I wanted my visuals to be incorporated in my designs so I had to experiment with different designs.
08/05/18 (Week 6)
I observed how it is important to make sure the designs for all three items should have some sort of consistency between them to make it match. It is also important to be careful while trying to cut and assemble the packaging.
13/05/19 (Week 7)
Through this assignment, I observed that the choice of material used is important as it reflects how it looks like when printed and folded. I also observed that it was satisfying to see all 3 items printed out due to the similar visuals and colour palette.
FINDINGS
15/04/19 (Week 3)
I found that I got a little lost while trying to come up with the designs, as I just started to come up with the visuals for my book. Once I'm done with the visuals, maybe it'll be easier me to come up with the designs to make sure it all matches.
24/04/18 (Week 4)
I found that I felt stuck at times and unsure of how I want to create the dielines, but by searching up references of the dielines it does help me a lot.
29/04/18 (Week 5)
I found that making more mock-ups and playing around with the designs helped me in deciding which are the ones I wanted to use for printing.
08/05/18 (Week 6)
Through this week, I found that I was kind of satisfied when I saw the printed designs, but it was stressful to cut and assemble the packaging because I was constantly worried about the folds and creases.
13/05/19 (Week 7)
I founded that creating a packaging from scratch is not easy for me as there were times where I struggled with creating them. In the end, I managed to complete all 3 items but I wished I could've done a better job at it.
FURTHER READINGS
Basic Pack by Index Book
 |
| Book Cover |
This book showcases various packaging designs from categories such as entertainment, fashion, health and beauty, home and office, industrial, food and beverage. Through the contents of this book, I got to look at all these photographs of packaging design and take it as an inspiration.
Here are some snapshots of my faves.


Get the best quality plastic and disposable food storage container in wholesale at affordable prices. Huang Xiang provides all kinds of food storage containers.
ReplyDeletethanks for sharing it.
ReplyDeleteRigid Boxes
Custom Rigid Boxes
great details about Product packaging
ReplyDeletevery Good Detail for packaging
ReplyDeleteRigid Boxes
Thank you for sharing this blog post. very informative..
ReplyDeleteBest Product Packaging Design refers to the creation of the exterior of a product. That includes choices in material and form as well as graphics, colors and fonts that are used on wrapping, a box, a can, a bottle or any kind of container. It's a practical tool, yes.
Thanks for sharing nice article.It is very informative.If you want your product branded then at the platform of Royal Custom Packaging, we offer eminent quality designs of Custom Boxes to make your business a trade-mark in the field of Custom Packaging.
ReplyDeletevery Good blog write of our beloved readers , in this blog you tell the importance of
ReplyDeletefood packaging boxes , i think you also share again such nice info , the way of your style for writing blog is very much outstanding, many of best ideas of modern packaging of different products that many of companies are performed very well like
gourmet packaging is perform very well . kindly share again such type of info. are you share again such type of info ?
Wonderful Blog!!!!!!!
ReplyDeleteThank you for sharing such an amazing piece of information regarding Packaging And Mechanism. Keep sharing.
Using Custom Soap boxes imprinted with your brand name is the best way to market your brand. Your brand logo and slogan are also printed on these custom boxes to grab customers’ attention. Now you can make a strong identity of your business with the help of custom cosmetic boxes.
ReplyDeleteInteresting article! Thank you for sharing them! I hope you will continue to have similar posts to share with everyone. Creative Packaging Design in New York
ReplyDeleteNice article. If you are dealing in luxury products and you need Rigid Boxes for these products then visi this website.
ReplyDeleteTuck end auto bottom boxesTuck end auto bottom boxes are available at thecosmeticboxes.com at a very low cost and various sizes for the customers. The base of these auto bottom boxes can be put together in a very easy and convenient way. They offer a greatly supportive. And secure packaging arrangements for makeup products and another cosmetic packaging.
ReplyDeleteYou have really done great job by sharing the beautiful post. Thanks lot for the informative post. Learn more about custom palette packaging boxes
ReplyDeleteGreat post! Thank you so much for sharing all this wonderful information. So much useful and easy to read for everyone.
ReplyDeleteHow to Differentiate Between CBD Tincture and CBD Oil?
It was an amazing blog. Very informative. Keep going. Good packaging boxes are a need of this century. From wholesaler to retailers, packaging boxes ae required and no one can take their place. Get Die Cut Kraft Boxes at wholesale rates.
ReplyDeleteThanks For sharing this Informative post. I really like to read about Custom Boxes and also My favorite is Custom Display Boxes.
ReplyDeleteI'm astoundingly happy to visit your enlightening Post. Custom Sleeve Boxes Bundling boxes are genuinely goliath for any sort of thing. To pack your things in an astonishing way then, at that point, utilize these Custom Sleeve Boxes with re-endeavored plans, styles, tones, shapes, and stocks. We are other than offering misuse free status and free improvement helps all around the USA.
ReplyDeleteThis is very useful information that you have shared with us. Are you seeking for a packaging service that is second to none? We deliver quality-oriented and food-grade Custom Bakery Boxes with Printing to improve your brand prosperity.
ReplyDeletePackaging Display Boxes increase the sales of the products. Because attractive display boxes attract the buyer towards and automatically increase the sales of the product. The customers will never get attracted towards the product. That is why instead of building brown colorful packaging boxes for each product. The color of the customized packaging display boxes is entirely depended on the nature of the product.
ReplyDeleteThanks for sharing the valuable information article Cosmetics tins Containers. Keep updating!
ReplyDeleteInformation provided in the article is very useful. If someone needs more information, he must visit here! best qaulity material for packaging
ReplyDeleteElegant, beautiful best quality material for packaging with customization and free delivery in USA..
ReplyDeleteChildren can be enticed by including puzzles in the packaging. There are no limits to creativity. Make an effort to stand out as much as possible. For our part, we'd like to include some unique secret compartments in the candy box for kids to play with while also enjoying themselves. These stimulating ideas may appear crazy at first, but when implemented, they can be extremely beneficial. We agree that they can be pricey, but imagine the buzz they'll generate once they're released. Using unique ideas to enrapture your customers with rigid box packaging can also be extremely beneficial.
ReplyDeletePackaging plays a vital role as customer experience is important for business. You get lucky if you have best packaging manufacturers in India, packaging company are known to offer constantly high-quality print and innovative packaging facilities. Only if they have their in-house creative agency, so be 100% sure while you choose packaging companies.
ReplyDeleteThanks for this post. we are providing Auto Lock Bottom Boxes for your business. Also providing free shipping in all over the state of USA.
ReplyDeleteI'm delighted to come to your informative post. Packaging For Food in the form of boxes is essential for every food product. Use these packaging with Customised patterns, styles, colors, shapes, and stocks to box your items in a creative manner. We also provide free design and delivery services across Ireland.
ReplyDeleteIt is quite informative to provide information to users. I appreciate you sharing this information with me. I'm attentively reading it. I was reading about Packaging Suppliers last week. Further, if you have any knowledge regarding any type of box, please share it with me in the form of an article. Thank you very much.
ReplyDeleteThanks for this post. we are providing Tuck End Auto Bottom Boxes for your business. Also providing free shipping in all over the state of Uk.
ReplyDeleteWell Written, This content is useful to me Luxury Rigid Box Manufacturer
ReplyDeleteThe packaging is designed around your product to make it fit perfectly rather than choosing a ready-made packaging that the product might fit into. If you are looking for Printed Packaging Boxes that actually sells, you must read this blog.
ReplyDeleteThis article is extremely educational lastly I got what I needed.
ReplyDeleteHolographic Foiling Boxes Thanks for sharing such a wonderful piece of information.
The article looks magnificent, but it would be beneficial if you can share more about the suchlike subjects in the future. Custom Metalized Boxes
ReplyDeleteThanks for sharing such important and useful information.
Dielines show all folds and cut lines of packaging that create a final diagram. The Visions Packaging has expert designers that create dielines according to the clear the mind of customers.
ReplyDeleteGreat tips regrading branded packaging solutions. You provided the best information which helps us a lot. Thanks for sharing the wonderful information.
ReplyDeleteVery good information about packing food. check food packaging paper bags
ReplyDeleteI would like to thank for sharing such as informative blog. I really like this blog keep it sharing.
ReplyDeletehouse clearance lowestoft Suffolk